The moment you realize your eyebrows are thinning often arrives quietly. It might happen under unforgiving bathroom lighting or while scrolling through a selfie where your eyes suddenly look less defined. The outer edges seem sparse, the arch disappears from certain angles, and even careful use of brow pencil doesn’t give the finish you expect. That’s usually when brow lamination enters the conversation. Then come the thoughts of salon bookings, expenses, travel time, and strong chemical smells. Eventually, you close the tab, rinse your face, and decide there must be a simpler, calmer solution.
Understanding At-Home Brow Lamination
The Quiet Satisfaction of Shaping Brows Yourself
There is something grounding about sitting at your bathroom counter late at night, the fan humming softly, music playing low, and realizing you can reshape your brows on your own. No bright salon lights. No forced conversation. Just you, a mirror, and a small brush. At-home brow lamination may sound technical, but the idea is straightforward. You gently guide your natural brow hairs into a direction that makes them appear fuller and more structured. You’re not creating new brows, only encouraging your natural shape to show its best version. Once the intimidating terms are removed, the process becomes simple: soften, shape, set, and nourish. With this rhythm in mind, brow lamination feels less like a procedure and more like a routine.
Creating a Calm and Intentional Setup
Before starting, take a moment to prepare your space. Clear a small area on the counter, reduce distractions, and place your tools in the order you’ll use them. This small act brings focus and ease. At-home brow lamination doesn’t require an overwhelming collection of products. Some prefer complete kits, while others choose gentler alternatives suitable for the delicate eye area. The guiding principle remains the same: use minimal product and prioritize gentle formulas.
 Lip Definition Trick: The Precise Liner Technique That Enhances Fullness Without Heavy Overlining
Essential Tools for Brow Lamination
- Soft facial cleanser to remove oil, makeup, and residue without irritating skin
- Brow spoolie to guide hairs into place; a clean mascara wand works well
- Lamination or lifting solution to relax brow hairs for reshaping
- Setting or neutralizing solution to hold the new shape
- Hydrating oil or serum to nourish brows and surrounding skin afterward
Standing in front of the mirror with these basics feels less like a cosmetic treatment and more like intentional self-care. You’re not aiming for perfection or professional skill. You’re simply learning how your brows grow and shaping them in a way that feels natural to you.
A Slow and Gentle Brow Lamination Routine
Your first at-home lamination should be unhurried. Notice the cool water on your skin, the light resistance as the spoolie moves through your brows, and the calm focus of the moment. This experience is about ease and awareness as much as it is about results.
Start With Clean Brows
Brows hold onto sunscreen, moisturizer, makeup, and natural oils. Clean the area with a fragrance-free cleanser, rinse with lukewarm water, and pat dry carefully. Use a cotton pad to ensure no residue remains. When brows are truly clean, each hair stands on its own, making shaping far easier.
Observe How Your Brows Naturally Grow
Before applying any product, take time to study your brows. Comb them upward with a clean spoolie and watch how each hair behaves. Some grow straight up, others angle sideways, and some lie flat. Notice thinner areas, sparse tails, or uneven arches. This awareness helps guide your shaping decisions and keeps the result looking authentic rather than forced.
Apply the Softening Formula With Care
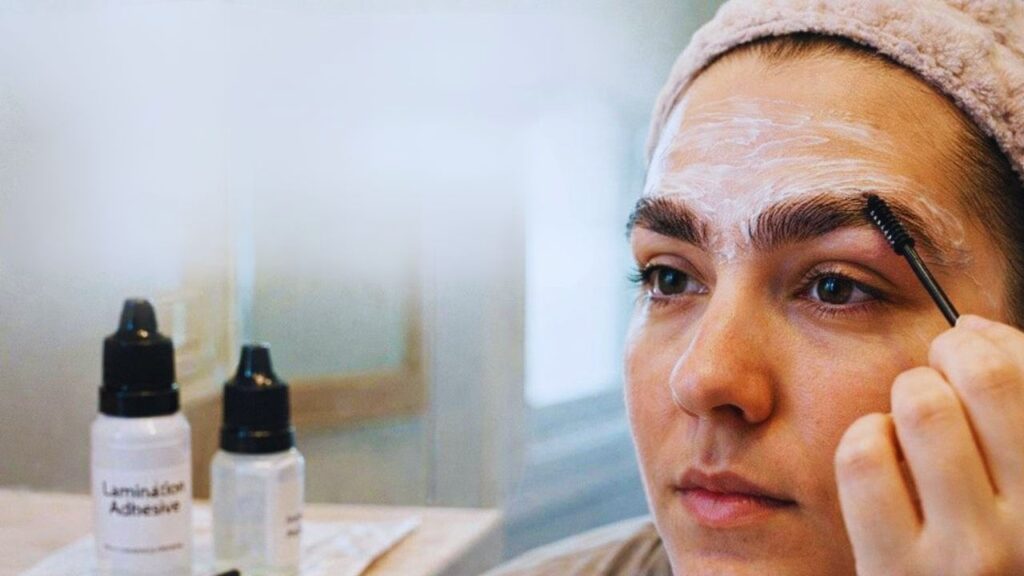
Using a micro brush or cotton swab, apply a small amount of lamination solution directly onto the brow hairs, avoiding the skin as much as possible. Think of this step as softening material before shaping it. Comb the product through the brows, brushing upward and slightly outward. Allow it to process only for the recommended time, usually a few minutes. If your brows are fine or delicate, a shorter processing time is always the safer choice.

Shape With Intention, Not Perfection
Once the hairs have softened, use a clean spoolie to guide them into place. Brush the inner brows upward to create fullness, then angle the arch and tail gently toward the temples. Absolute symmetry isn’t necessary. Natural brows are rarely identical, and that uniqueness keeps them believable. The goal is balance and harmony, not duplication.
Set and Secure the Shape
After removing excess softening solution, apply a light layer of the setting or neutralizing product. Comb through again, holding stubborn hairs in place for a few seconds if needed. Once set, gently wipe away residue and step back. The change is often immediate. Brows appear lifted, fuller, and more defined while still looking natural.
What Happens After Lamination
Freshly laminated brows can feel dramatic at first, much like adjusting to a new haircut. Give them time. As natural oils return and the hairs relax slightly, the look softens. For the first 24 hours, avoid heavy moisture, steam, or rich creams around the brow area. By the second or third day, daily styling becomes easier. Instead of filling and fixing, a quick brush-through is often enough to maintain a polished, effortless look.
Maintaining Healthy, Full Brows
To keep brows looking thick and healthy, treat them with care rather than constant styling. Each evening, apply a small amount of nourishing oil or serum, such as castor oil, and gently massage it in the direction of hair growth. This helps condition the hairs and support the skin beneath. Just as important is restraint. Over-plucking can undo progress. Remove only obvious stray hairs and allow the rest to contribute to natural fullness.
Developing Your Own Brow Routine
With time, you’ll find a rhythm that works for you. Some prefer laminating every six to eight weeks, pairing it with other quiet self-care rituals. Others choose gentler techniques more frequently and focus on daily nourishment. Think of brow care as a cycle rather than a strict rule. Your brows will signal when they need attention. The advantage of doing this at home is awareness. You learn what your skin tolerates, how long is just enough, and where your natural arch wants to sit. Instead of following trends, you respond to your reflection and grow confident in shaping your own features.